When you use PDFs for strictly business-related reasons, protecting them with passwords is essential to secure confidential information.
Since you likely already know as much, and possibly all the other benefits of password-protecting PDFs, let’s get on with the meat of the article: how to add a password to a PDF!
Option #1: Password protect PDFs in Preview
Let’s begin with the most commonly-used option — the Preview app (aka, Mac’s default PDF tool where all your PDF documents open). Here’s how you’ll be able to password protect on Preview:
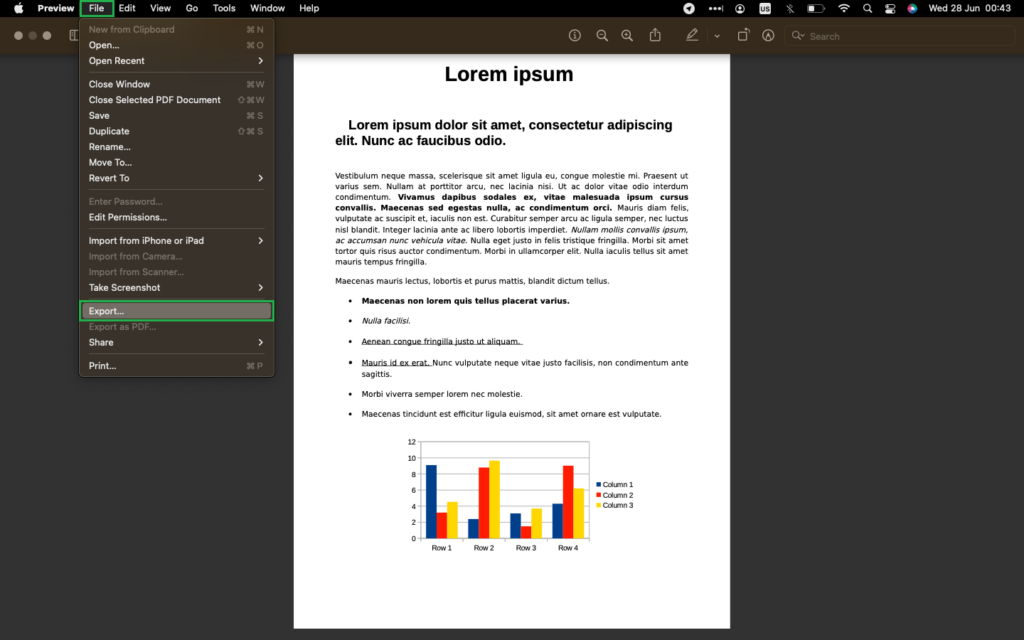
Step 1: Open your PDF file, and click on the left button on the top that says “File,” then click on “Export.”
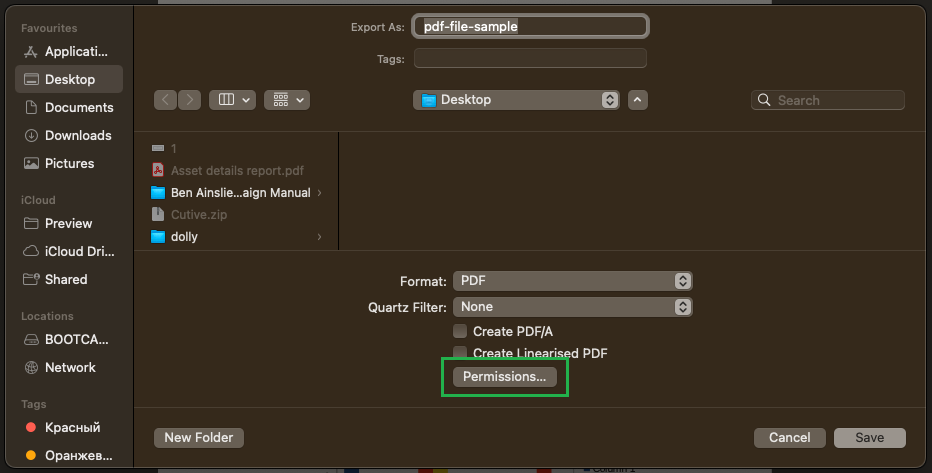
Step 2: Select the Permissions button.
Step 3: Once that’s done, you can password-protect your PDF and adjust other permissions.
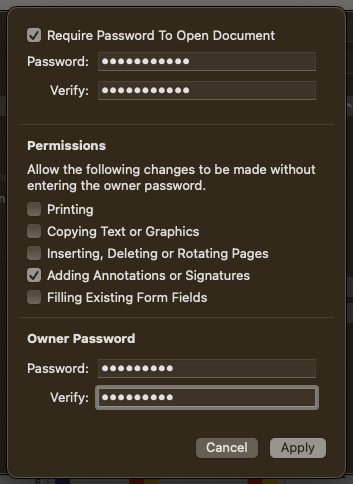
Step 4: If you’ve moved forward with the password protection option, confirm the password and select “Apply.” After this, select “Save.”
Option #2: Use PDFplatform
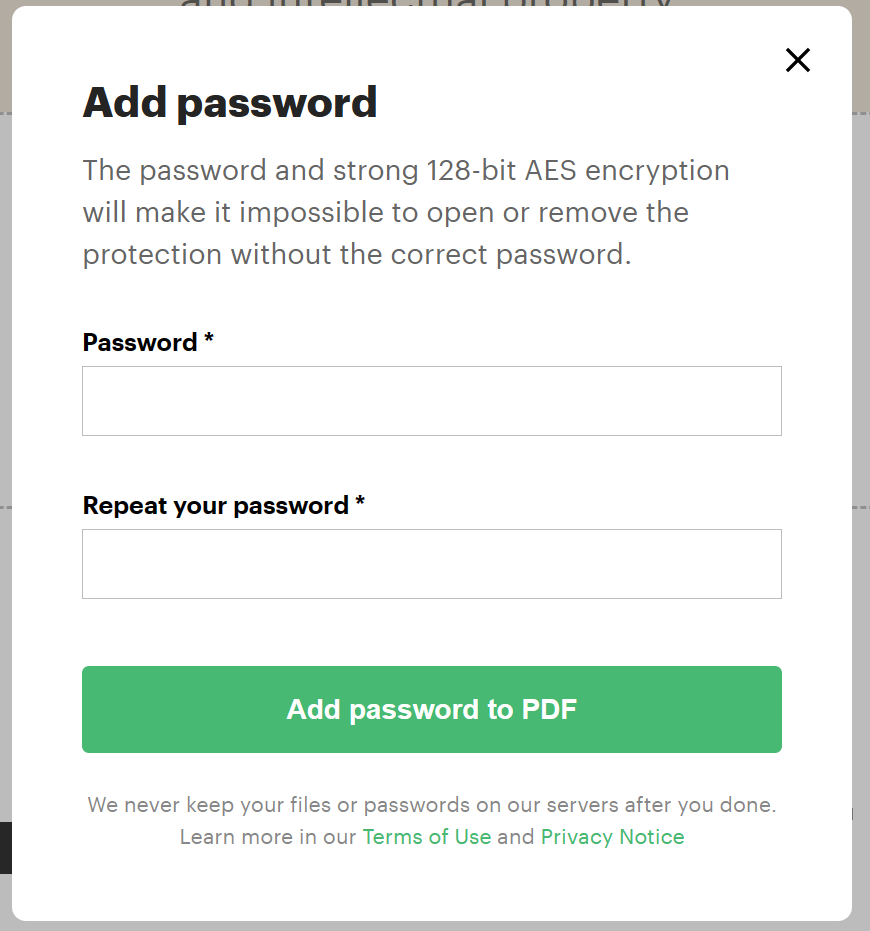
If you’re wondering how to encrypt PDFs using other methods besides Preview, PDFplatform is another option and a free tool you can use. Simply head on over to the platform, and select “All Tools.”
From there, under “Sign and Security,” click on “Protect PDF.”
Here, you can upload the file you want to encrypt with a password or drag and drop it. Once the file has been uploaded, type and reconfirm your password, and then select the green button that says “Add password to PDF.”
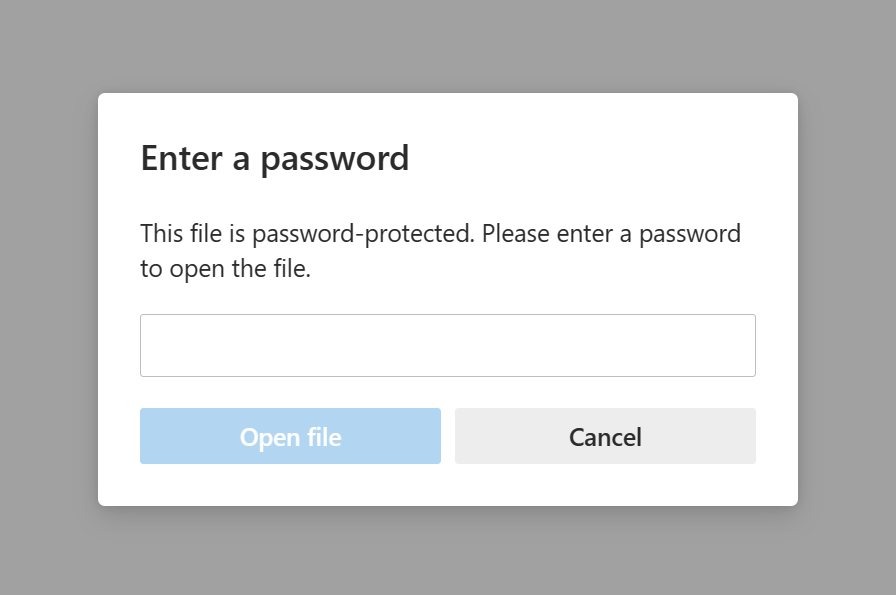
And that’s it! Your file has now been downloaded with 128-bit AES encryption. This is what it will look like if you click on it.
Option #3: Use other online software
While we have our eyes set on PDFplatform to complete the task of protecting our documents, there are other online software options on the market that can help you complete the same task.
Out of the plethora of solutions available (i.e., Adobe, SmallPDF, iLovePDF, Wondershare PDFelement, SodaPDF), one that sticks with users the most is Adobe Acrobat, so we’re going to show you how to password-protect your PDF files on Mac using Adobe Acrobat.
Step 1: Drag and drop or upload your PDF documents into Adobe (you can do so with the “Select a File” option).
Step 2: From the listed tools, select “Protect.”
Step 3: Select “Add,” and in the box that appears, add your new password and then confirm it by retyping the same password.
Step 4: Select “Set Password” and then download, save, or share the file.
Side note: For the most part, only users who have an Adobe Acrobat subscription can use the password protect feature unless they are using Adobe in the previous versions of Windows (and even then, you can only use this feature for free in select countries).
An alternate solution
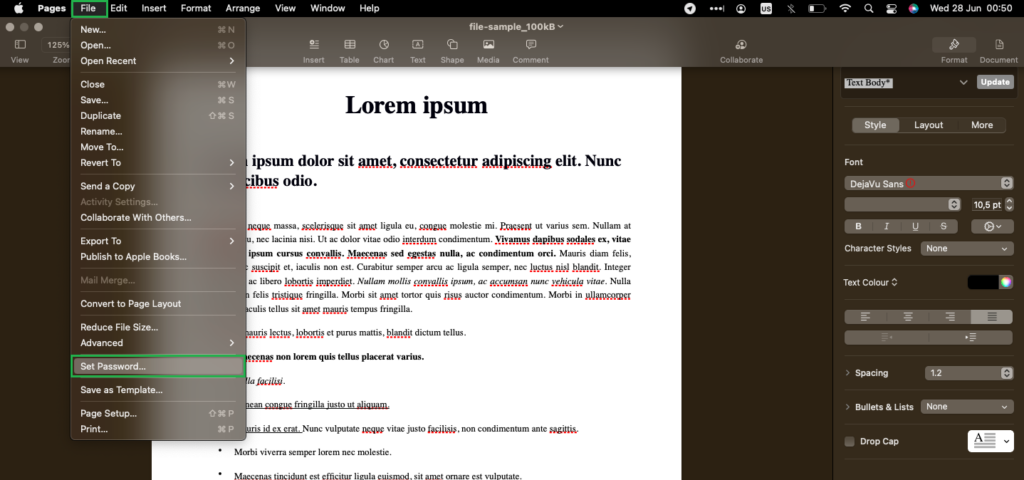
Another way to add password protection to your PDF documents is to secure them when they’re Word files and then export them as PDFs.
For example, if you’re on Pages (Apple’s version of Word), you can simply go to “File” and select “Set Password.”
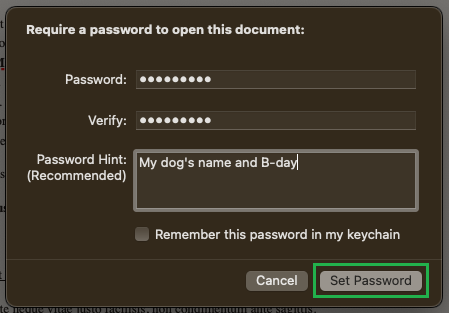
You’ll be required to set up your password, reconfirm it, add a password hint, and the option to remember it. Once all fields have been set, click on “Set Password.”
After the password has been set, click File > Export to > PDF. Here, you’ll get the option to require a password to open the document, so click on it and then decide if you want to keep the same password or change it.

Taking care of PDFs: What’s next?
Since you’re out there password-protecting PDF documents day in and day out, we’ll go out on a limb here and assume you’re someone who deals with PDF documents quite often.
And if that’s the case, you need to educate yourself on how to manage, edit, optimize, protect, unprotect, and convert PDF documents for daily use cases.
A simple way to do all of these tasks is to use a free tool like PDFplatform. To learn more about what PDFplatform can offer you, click here to browse the solution for yourself.